Friday, January 15, 2010

Growing Ladies Finger Bhindi in pit system summer cultivation technique

Growing Ladies Finger Bhindi in pit system summer cultivation technique by Pritham 'Metal Farmer' D'Souza

Bhindi or bende kai or okra Ladies finger(Abelmoschus esculentus) is a popular summer vegetable grown extensively along the coast of Mangalore.
The tender fruits have rich iodine content which is used in the treatment of goitre , while the leaves are used for treatment of dysentery and inflammation.
The dry seeds have rich edible oil content of up to 20 % and protein up to 25%


From Growing Ladies Finger Bhindi in pit system summer cultivation technique


CLIMATE AND SOIL
  • Okra requires hot and humid climate and is very effective within the range of 25 to 30 degrees centigrade
  • higher temperatures will result in dessication of flowers and hence lower yields
  • for the seed to germinate, the min soil temp should be within the range of 25 to 35 degrees
  • well drained soils, loose and friable soils with rich organic content is best
LAND PREPARATION

From Growing Ladies Finger Bhindi in pit system summer cultivation technique
The land selected for okra cultivation should be free from previous plant debris and residue

From Growing Ladies Finger Bhindi in pit system summer cultivation technique
The previous ridges and furrows must be leveled and land made flat

From Growing Ladies Finger Bhindi in pit system summer cultivation technique
rocks, plant residue, clods and other unwanted materials must be removed

From Growing Ladies Finger Bhindi in pit system summer cultivation technique
pits with 1 feet depth and 2 feet width must be dug as shown

  • The above pics shows the selection of land and the initial steps taken to prepare for sowing
  • The older rows and furrows from the previous crop must be completely leveled and made flat
  • stones, sticks, twigs, clods and plant residue must be removed from the soil
  • the soil needs to be pulverized, moistened and enriched with decomposed organic manure or farm yard manure before sowing the seeds

From Growing Ladies Finger Bhindi in pit system summer cultivation technique
Distance between pits is maintained as Okra shows vigorous vegetative growth. plant density and spacing can also be maintained

From Growing Ladies Finger Bhindi in pit system summer cultivation technique
adding 1 bucket of decomposed farm yard manure per pit is recommended

PIT MAKING AND SOWING
  • pits which are 2 feet wide and 1 feet deep should be dug as seen in the images above and distance between the pits also has to be maintained
  • at least 4 to 5 seeds must be hand dibbled in the soil in every pit. once germination takes place, only 2 or 3 seeds retained per pit. the germinated seedlings can be thinned out and later transplanted in pits where germination is less
  • 2 or 3 days before sowing the seeds, 5 to 10 kg(approx) Organic manure should be added to enrich the soil.
  • The seeds can be soaked in curds/milk over night to soften the hard seed coat a day before sowing operations
  • light irrigation must be given immediately after sowing the seeds and care should be taken to see the seed is not dislodged from its place.
  • The most viable seeds take up to 5 days to germinate.
From Growing Ladies Finger Bhindi in pit system summer cultivation technique
View of plot after germination

From Growing Ladies Finger Bhindi in pit system summer cultivation technique
Complete view of plot

From Growing Ladies Finger Bhindi in pit system summer cultivation technique

When plant attains 4 leaf stage, 2 buckets of decomposed farm yard manure is again added to each pit

IRRIGATION AND MANURING
  • Light irrigation is given immediately after sowing in soil
  • watering needs to be done everyday till the plant attains 4 leaf stage
  • once the plant establishes itself properly in the pit, the frequency of irrigation can be reduced from thrice weekly to twice weekly.
  • its advised to give the plant NKP or nutrients in 3 split doses, one at the time of sowing, the second during the growth vegetative phase and the final at the time of flowering
  • Spraying with organic inputs like algae solutions and bacterial gels at least once weekly will take care of its micro and trace nutrient requirements
From Growing Ladies Finger Bhindi in pit system summer cultivation technique
A close up of the growing Okra plant

From Growing Ladies Finger Bhindi in pit system summer cultivation technique
Growth visible after a few days

From Growing Ladies Finger Bhindi in pit system summer cultivation technique
In pits which do not have germination, plants need to be transplanted and shade provided

From Growing Ladies Finger Bhindi in pit system summer cultivation technique
View of the same plot after 10 days

OTHER INTERCULTURE OPERATIONS
  • Weeds are a menace to the main crop and need to be removed at every stage of plant development.
  • at the time of manuring, the plant needs support at the base of the stem and earthing up operations are done.
  • inter culture operations will also help in aerating the soils
  • Spraying the crop with female flower inducing hormones or sprays can be done at least 10 days before flower bud formation
  • All spraying operations should be done in the mornings, when the temperature is not too high and similarly at evenings after 4 pm when the light intensity is not high.
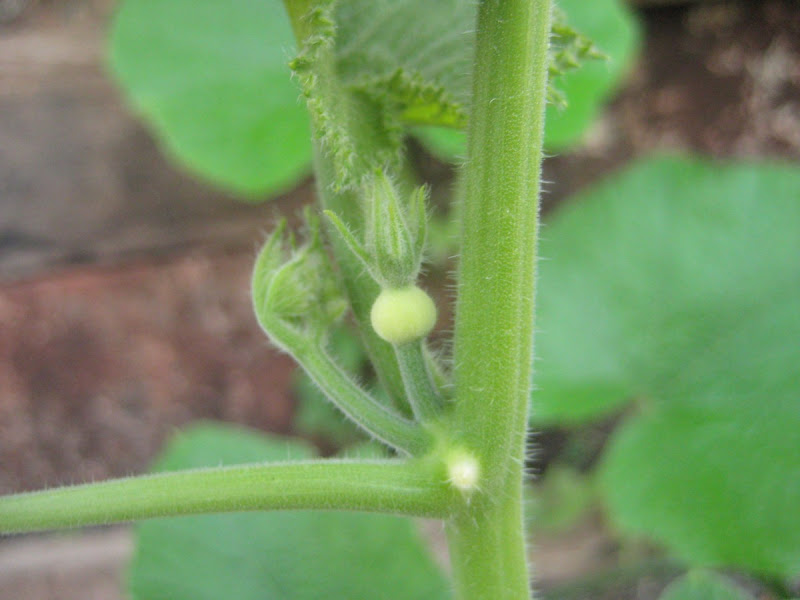
From Growing Ladies Finger Bhindi in pit system summer cultivation technique
Flowering seen after 45 days

From Growing Ladies Finger Bhindi in pit system summer cultivation technique
Lush green growth of Okra

From Growing Ladies Finger Bhindi in pit system summer cultivation technique
The broad leaves of Okra act as shade retaining the soil moisture

From Growing Ladies Finger Bhindi in pit system summer cultivation technique
Distance between pits maintained such that leaves do not overlap

HARVESTING AND AFTERCARE
  • the first flowers are seen after 45 to 55 days from the date of sowing
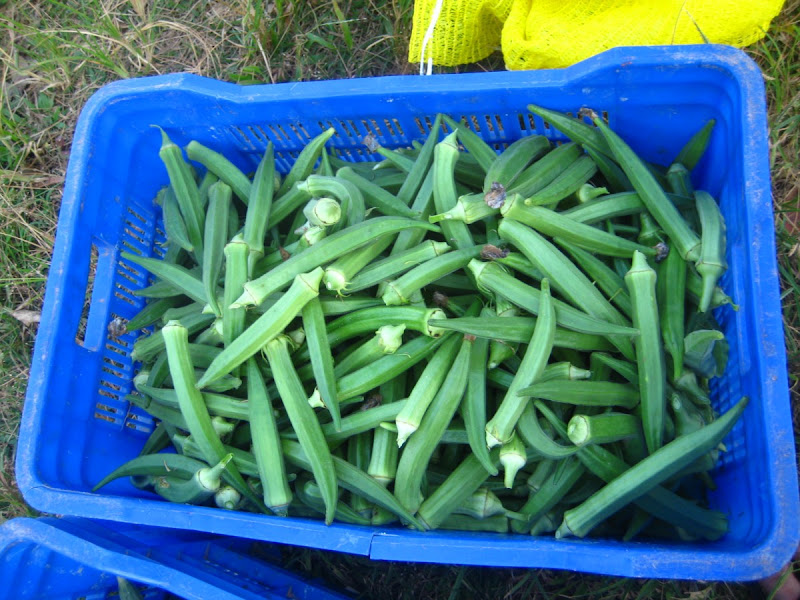
  • harvesting the tender fruits must be done preferably early mornings or late evenings
  • a glove or piece of cloth must be used to protect against the prickly leaves and stem of the plant which can cause irritation and even rash to some people
  • the plant will continue to yield for another 50 days
  • once the plant has reached a maximum height, lateral branches start to sprout giving it a total bushy appearance, at this stage, pruning the top can be done, even though its not recommended as it is cumbersome
From Growing Ladies Finger Bhindi in pit system summer cultivation technique
Fruiting in Okra

From Growing Ladies Finger Bhindi in pit system summer cultivation technique

Ready to Harvest

OBSERVATIONS
  • since okra has a tap root system and not fibrous root system, i decided to experiment with pit method rather than the traditional ridge and furrow method.
  • there was all around progress in almost every department from weeding to irrigation
  • plant population and density was maintained
  • no wastage of irrigation water as each pit required the same amount of water
  • even manure application for every pit was the same
  • keeping distance between pits helped greatly in harvesting, as the plants got maximum space and no over lapping of leaves was seen.
View slide show presentation here


All data and images by Pritham Denzil D'Souza

Saturday, January 9, 2010

Growing Radish without Soil using Simplified Hydroponics in Mangalore

Growing Radish without Soil using Simplified Hydroponics in Mangalore by Pritham D'Souza

From Hydroponic Radish grown in Mangalore

Radish being a root crop requires adequate spacing for root development. pic taken 13 nov 2009

From Hydroponic Radish grown in Mangalore

close up of radish seedling, which germinated within 4 days of sowing

From Hydroponic Radish grown in Mangalore

since it is a root crop, NO TRANSPLANTING is done. so the container chosen should have sufficient depth

From Hydroponic Radish grown in Mangalore

26 days later pic taken on 9 Dec 2009, also brahmi root stem planted next to growing radish

From Hydroponic Radish grown in Mangalore

8 days later, 17 Dec 2009, the radish leaves show better growth and also the brahmi stem next to it starts to sprout new leaves

From Hydroponic Radish grown in Mangalore

another view of Luxuriant radish growth

From Hydroponic Radish grown in Mangalore

Dec 25, 2009, even though the leaves are ready for harvest, i decided to keep it for a few more days

From Hydroponic Radish grown in Mangalore

the best part in simplified hydroponics is the portability of the gardens. here you can see my radish tub placed in my kitchen

From Hydroponic Radish grown in Mangalore

4 Jan 2010, the developing radish root

From Hydroponic Radish grown in Mangalore

5 jan 2010, couldnt control the urge to eat radish leaves, so got them harvested

From Hydroponic Radish grown in Mangalore

another view of freshly harvested radish leaves

From Hydroponic Radish grown in Mangalore

jan 5 2010, radish leaves are harvested and you can see brahmi plant with its heart shaped leaves growing very well

From Hydroponic Radish grown in Mangalore

Jan 5 2010, final picture of radish

View Slide Show here


Growing Pumpkins using Simplified Hydroponics in Mangalore, India

Growing Pumpkins using Simplified Hydroponics in Mangalore, India by Pritham D'Souza


From Hydroponic Pumpkins grown in Mangalore

germinated seeds of palak, amaranthus and pumpkins in a germinating tub

From Hydroponic Pumpkins grown in Mangalore

ready to transplant once 3 leaf stage is attained

From Hydroponic Pumpkins grown in Mangalore

watering the plants to loosen the roots before uprooting the plant for transplanting

From Hydroponic Pumpkins grown in Mangalore

watering with nutrient water after transplanting . pic taken 5 nov 2009

From Hydroponic Pumpkins grown in Mangalore

pic taken 13 nov 2009, exactly a week after transplanting

From Hydroponic Pumpkins grown in Mangalore

pic taken 24 nov 2009, 10 days later, excellent vegetative growth and flower bud formation

From Hydroponic Pumpkins grown in Mangalore

24 nov 2009, tiny developing flower and fruit buds

From Hydroponic Pumpkins grown in Mangalore

pic taken 27 nov 2009, more growth and more buds visible

From Hydroponic Pumpkins grown in Mangalore

nov 27 2009, the develpoing bud

From Hydroponic Pumpkins grown in Mangalore

2 dec 2009, flowering and pollination seen and luxuriant growth

From Hydroponic Pumpkins grown in Mangalore

after pollination, the fertilized developing embryo

From Hydroponic Pumpkins grown in Mangalore

9 nov 2009 growing fruit buds

From Hydroponic Pumpkins grown in Mangalore

close up of growing fruit bud, tender buds can be identified by lite yellow color as seen

From Hydroponic Pumpkins grown in Mangalore

vine length reaches over 2 meters

From Hydroponic Pumpkins grown in Mangalore

another view of flowering and fruiting pumpkin plant

From Hydroponic Pumpkins grown in Mangalore

harvest index reached. pumpkins can be harvested after yellow colored fruits change to lite orange. once the fruits are harvested, it facilitates the development of more flower and fruit buds.
date of sowing 28 oct 2009
date of harvest 18 nov 2009
50 day crop


View slide show here


all pics and data by Pritham D'Souza