Showing posts with label Summer Technique. Show all posts

Wednesday, October 6, 2010

Bottle Gourd Cultivation in Pits, Summer Technique

Bottle Gourd Cultivation in Pits, Summer Technique by MetalFarmer Pritham D'Souza

From Bottle Gourd Cultivation in Pits, Summer Technique


Bottle Gourd (Lagenaria siceraria) is one of the most widely consumed vegetable crops grown in Dakshina kannada district. its also called Thure (Tulu), Bobley (Konkani) and Soorae kai (Kannada). It has several uses from preparing different kinds of sweets, hail oil (from seeds), hard shells used as floats in fishing nets and also in making some musical instruments.

The hybrid varieties can yield up to 8 to 10 tonnes per acre and is a commercially viable croo

From Bottle Gourd Cultivation in Pits, Summer Technique


LAND PREPARATION
  • the land selected here is a hillock and pits are made at the base of the hillock as shown
  • a bucket of fresh decomposed farm yard manure is added to each pit and soil mixed well
  • stones, twigs, inert matter etc are removed
  • 3 or more seeds are then sowed in each pit
  • after germination, once the seedlings reach 4 leaf stage, thinning out is done and only 2 seedlings per pit allowed
From Bottle Gourd Cultivation in Pits, Summer Technique


From Bottle Gourd Cultivation in Pits, Summer Technique


From Bottle Gourd Cultivation in Pits, Summer Technique


From Bottle Gourd Cultivation in Pits, Summer Technique


From Bottle Gourd Cultivation in Pits, Summer Technique


IRRIGATION AND MANURING
  • since they are grown in pits, wastage of water is prevented
  • light irrigation is a must after seeds are sowed and till transpanting
  • dried leaves act as an excellent mulch and prevent loss of water due to evaporation
  • its always recommended to give the crop nutrients in split doses.
  • on the 20th day after germination, when the growing vines begin to develop, farm yard manure, decomposed, can be added to each pit @ 5kg per pit (minimum requirement)
  • the fully grown plant requires a lot of water and so mulching is required
From Bottle Gourd Cultivation in Pits, Summer Technique


From Bottle Gourd Cultivation in Pits, Summer Technique


From Bottle Gourd Cultivation in Pits, Summer Technique


From Bottle Gourd Cultivation in Pits, Summer Technique


From Bottle Gourd Cultivation in Pits, Summer Technique


From Bottle Gourd Cultivation in Pits, Summer Technique


FLOWERING AND HARVEST
  • bottle gourds are ready to harvest after 50 days from first day of sowing
  • the edible fruits are the ones whose skin color facing the sun is green
  • harvesting must be done using a knife.
From Bottle Gourd Cultivation in Pits, Summer Technique


From Bottle Gourd Cultivation in Pits, Summer Technique


From Bottle Gourd Cultivation in Pits, Summer Technique


SOME IMPORTANT TIPS AND POINTS WHEN GROWING BOTTLE GOURDS
  • when manuring with fresh decomposed manure, care should be taken to see that the manure is added to the root zone area only and not on top of the plant as it might damage the leaves
  • weeding is very important and tall growing weeds above the growing vines should be oulled out
  • application of too much Nitrogen will result in excessive biomass and subsequently less yields
  • application of too much Nitrogen will also produce more male flowers which is not desired
  • deficiency of K (potassium) in soils reduces plant growth significantly and causes flower and fruit drop
  • soil temperature is very essential and germination of seeds wont take place if soil temp is less than 10 degrees centigrade
  • excess temperature over 40 degrees centigrade can cause scorching of leaves
Note: the pale green color on one side of the fruit is because that part did not receive sunlight and it is nothing to worry about, the taste and quality is not compromised.

From Bottle Gourd Cultivation in Pits, Summer Technique


all photos and data by Pritham 'MetalFarmer' D'Souza

Thursday, September 23, 2010

Technique of Growing Indian Spinach on the ground

Technique of Growing Indian Spinach on the ground by Pritham Denzil D'Souza aka MetalFarmer

Traditionally Indian Spinach also known as Basale soppu in tulu and Valchhi bajji in konkani is grown on a trellis. While respecting our traditional farming practices, we also must learn to innovate and improvise, and if works out, share data for free that will benefit farmers all over. Growing Spinach on the ground was done merely as a challenge to growing them using support or a trellis.

From Growing Indian Spinach on the ground at Padval Farms, Mangalore, India


STEP BY STEP PICTORIAL GUIDE TO GROWING SPINACH ON THE GROUND

From Growing Indian Spinach on the ground at Padval Farms, Mangalore, India


  • as you can notice in the pic above, a trench with a minimum width of 1 meter and max length is made
  • weeds, stones and other unwanted materials are removed
  • 1 load of freshly decomposed farm yard manure is added and the soil is mixed well
From Growing Indian Spinach on the ground at Padval Farms, Mangalore, India


  • bunds are made to the entire row length as seen above
  • the bunds act as make shift pits where the spinach stick will be transplanted
From Growing Indian Spinach on the ground at Padval Farms, Mangalore, India

From Growing Indian Spinach on the ground at Padval Farms, Mangalore, India


From Growing Indian Spinach on the ground at Padval Farms, Mangalore, India

  • from the older spinach plant, long and healthy spinach vines are selected for transplanting as seen above
  • the long spinach vines are then cut in half to get 2 spinach sticks of approx equal length
From Growing Indian Spinach on the ground at Padval Farms, Mangalore, India


From Growing Indian Spinach on the ground at Padval Farms, Mangalore, India


  • from the base of the spinach stick, all the leaves are plucked out leaving only a few leaves at the top
  • this is also done for polarity
From Growing Indian Spinach on the ground at Padval Farms, Mangalore, India


From Growing Indian Spinach on the ground at Padval Farms, Mangalore, India

  • 2 pairs of spinach sticks are then transplanted in every bund pit as shows and covered with soil. so every bund pit will have 4 transplanted sticks
From Growing Indian Spinach on the ground at Padval Farms, Mangalore, India


  • in around 50 days, the vines grow luxuriently and a number of lateral shoots also emerge and the spinach is now ready to harvest
From Growing Indian Spinach on the ground at Padval Farms, Mangalore, India


  • here harvesting is done cutting off the long spinach vines and tying around 10 sticks to make a bundle.
  • more number of cuttings, will produce more number of lateral shoots.
From Growing Indian Spinach on the ground at Padval Farms, Mangalore, India


  • daily irrigation is a must as the spinach sticks need all the moisture they can get
  • covering the transplanted spinach sticks with coconut palms and banana leaves is also done to prevent excess damage due to high temp.
  • banana leaves, arecanut palms and coconut palms are also placed on the ground to prevent the growing spinach vines in coming to contact with the soil
  • manuring is done again after 30 days from first transplanting
  • only decomposed farm yard manure is suitable as fresh un decomposed manure will destroy the developing roots and kill the vines
all images and data by Pritham Denzil D'Souza 'Metalfarmer'


      Growing Cowpea Beans in Pit Method Summer Cultivation

      Growing Cowpea Beans in Pit Method Summer Cultivation by Pritham 'Metal Farmer' D'Souza

      From Growing Cowpea Lentils using Pit Method at Padval Farms, India


      Cowpea (Vigna unguiculata) is a very popular vegetable grown in Mangalore and other parts of th country. It has been grown in India since the Vedic period. The entire plant is of economic importance, the pods harvested are rich in proteins, while the foliage is used as green manure and fodder for animals. Its called Alasandae in kannada, alasundae sango in konkani and Lattanae in Tulu

      CLIMATE AND SOIL

      From Growing Cowpea Lentils using Pit Method at Padval Farms, India


      From Growing Cowpea Lentils using Pit Method at Padval Farms, India


      • requires well drained soils
      • saline or alkaline soils should be avoided
      • it can tolerate drought to a certain extent but cannot withstand water logging
      • partial shade is tolerated however its highly succeptable to frost
      • being a tropical crop it thrives at temps between 21 to 35 degrees centigrade
      LAND PREPARATION

      since this crop is grown on a hilly area, we chose to grow it in pits and not the traditional method of growing them in rows.
      • square pits the size of 90cmx90cm with depth of 30 cm are made as shown
      • the distance between the pits is maintained
      • each pit, 2 buckets of decomposed farm yard manure is added and the soil is well mixed
      • around 5 seeds are sowed in each pit and after germination 4 are retained in each pit
      Since this variety grows long, it requires vertical support and hence the distance between the pits is very important to prevent over crowding.

      From Growing Cowpea Lentils using Pit Method at Padval Farms, India


      MANURING AND IRRIGATION
      • being a root nodule crop, heavy nitrogen fertilizer application is not required, however timely application of nutrients allows for better yield results
      • since we apply only decomposed farm yard manure with bacterial culture for faster decomposition, we split the manure application into 3 doses. first dose at the time of land preparation and sowing. second dose, when the plant has attained a height of 45 cms and the third and final dose on the on set of flower buds.
      • since this is a summer method of cultivation, irrigation is very important and must be done at regular intervals to avoid wilting due to extreme temperatures.
      • light irrigation at germination stage followed by irrigation during the early hours of the day is best for the crop during later growth
      • not much mulching is required as the root zone will get adequate shade from the plant
      From Growing Cowpea Lentils using Pit Method at Padval Farms, India


      From Growing Cowpea Lentils using Pit Method at Padval Farms, India


      From Growing Cowpea Lentils using Pit Method at Padval Farms, India


      From Growing Cowpea Lentils using Pit Method at Padval Farms, India


      OTHER AGRI OPERATIONS
      • weeds are a serious pest and need to be dealt with immediately
      • during the second and third manure applications, the soil surrounding the roots are made loose and manure mixed properly. this increases soil aeration
      • when the plant start to develpo long tendrils, vertical support needs to be given as shown
      • the plants are then trained to grow on the support
      From Growing Cowpea Lentils using Pit Method at Padval Farms, India


      FLOWERING AND HARVEST
      • most varieties start to produce flower buds after 45 days after sowing, and pods can be harvested after 15 days after pod setting
      • the fruits formed can be harvested up to 45 to 60 days after flowering and then there will be gradual decrease in yield and also quality.
      • spraying with plant hormones before the onset of flowering, produces more female flowers and is recommended
      • growing flower crops like marigold side by side also increases the yield due to increase in pollinating agents like bees, wasps etc
      From Growing Cowpea Lentils using Pit Method at Padval Farms, India


      From Growing Cowpea Lentils using Pit Method at Padval Farms, India


      From Growing Cowpea Lentils using Pit Method at Padval Farms, India


      From Growing Cowpea Lentils using Pit Method at Padval Farms, India


      PEST AND DISEASE MANAGEMENT
      Pod borer (Muruca tesulatis and Lampides boeticus) is the single most destructive pest, resulting in over 80 percent crop loss. colonies of aphids are also seen on young leaves and inflorescence and makes harvesting difficult. Leaf eating caterpillars tend to skeletonise the plants if not checked properly
      • for pod borer, chemical application is foliar spray with a combination of profenophos and cypermethrin @2 ml per litre of water sprayed at interval of 10 days just at the onset of flower bud formation.
      • we use pure neem oil @10 ml per litre of water and sprayed at 7 day intervals
      the application of neem is not a 100 percent guarantee to eliminate pod borer problem, but it controls the problem to a great extent and is an organic method of controlling
      • for leaf eating caterpillars, hand picking using gloves and destroying the pests is the best option even though its cumbersome.
      • aphid problem can be controlled by using the least toxic imidochloprid @half ml per litre of water at 14 day intervals. other chemical method is using Dimethoate Rogar at 1 ml per litre of water and sprayed when the incidence is observed.
      From Growing Cowpea Lentils using Pit Method at Padval Farms, India


      SOME IMPORTANT TIPS
      • bugs that emit characteristic odor are not a serious pest and can be controlled using neem sprays
      • Bruchid (Callosobruchus chinensis) causes damage to stored cowpea seeds by the grubs which turn the seed hollow by eating from inside. infestation starts in the field but can be seen mostly at storage. adding 2 percent edible oil (volume by weight) controls this problem for at least 5 months. seeds have to be dried thoroughly before storage.
      • foliar application of neem should be done in the evenings when the intensity of sunlight is less. after 4 pm before 6 pm is ideal
      • the tender succulent pods are preferred to over ripe wrinkled pods. and so harvesting every day is recommended to avoid this problem
      all images and data by Pritham 'Metal Farmer' D'Souza

      Friday, January 15, 2010

      Growing Ladies Finger Bhindi in pit system summer cultivation technique

      Growing Ladies Finger Bhindi in pit system summer cultivation technique by Pritham 'Metal Farmer' D'Souza

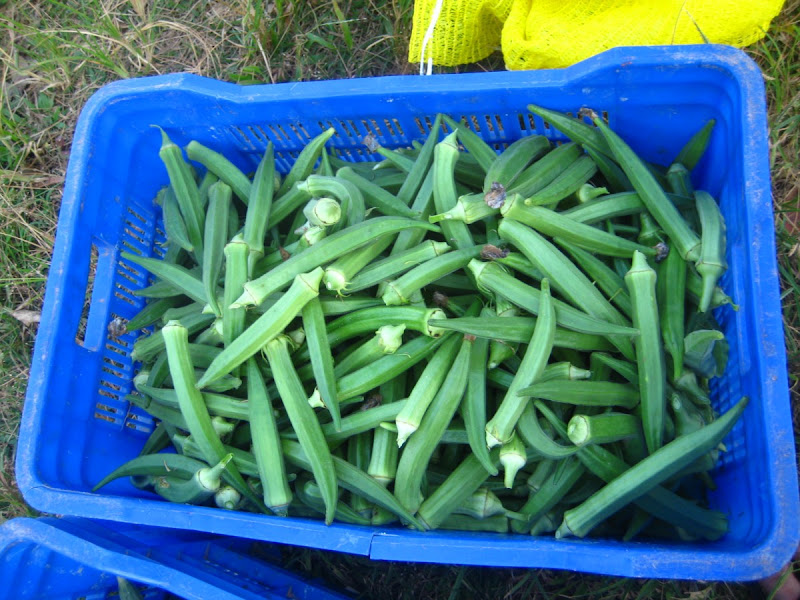
      Bhindi or bende kai or okra Ladies finger(Abelmoschus esculentus) is a popular summer vegetable grown extensively along the coast of Mangalore.
      The tender fruits have rich iodine content which is used in the treatment of goitre , while the leaves are used for treatment of dysentery and inflammation.
      The dry seeds have rich edible oil content of up to 20 % and protein up to 25%


      From Growing Ladies Finger Bhindi in pit system summer cultivation technique


      CLIMATE AND SOIL
      • Okra requires hot and humid climate and is very effective within the range of 25 to 30 degrees centigrade
      • higher temperatures will result in dessication of flowers and hence lower yields
      • for the seed to germinate, the min soil temp should be within the range of 25 to 35 degrees
      • well drained soils, loose and friable soils with rich organic content is best
      LAND PREPARATION

      From Growing Ladies Finger Bhindi in pit system summer cultivation technique
      The land selected for okra cultivation should be free from previous plant debris and residue

      From Growing Ladies Finger Bhindi in pit system summer cultivation technique
      The previous ridges and furrows must be leveled and land made flat

      From Growing Ladies Finger Bhindi in pit system summer cultivation technique
      rocks, plant residue, clods and other unwanted materials must be removed

      From Growing Ladies Finger Bhindi in pit system summer cultivation technique
      pits with 1 feet depth and 2 feet width must be dug as shown

      • The above pics shows the selection of land and the initial steps taken to prepare for sowing
      • The older rows and furrows from the previous crop must be completely leveled and made flat
      • stones, sticks, twigs, clods and plant residue must be removed from the soil
      • the soil needs to be pulverized, moistened and enriched with decomposed organic manure or farm yard manure before sowing the seeds

      From Growing Ladies Finger Bhindi in pit system summer cultivation technique
      Distance between pits is maintained as Okra shows vigorous vegetative growth. plant density and spacing can also be maintained

      From Growing Ladies Finger Bhindi in pit system summer cultivation technique
      adding 1 bucket of decomposed farm yard manure per pit is recommended

      PIT MAKING AND SOWING
      • pits which are 2 feet wide and 1 feet deep should be dug as seen in the images above and distance between the pits also has to be maintained
      • at least 4 to 5 seeds must be hand dibbled in the soil in every pit. once germination takes place, only 2 or 3 seeds retained per pit. the germinated seedlings can be thinned out and later transplanted in pits where germination is less
      • 2 or 3 days before sowing the seeds, 5 to 10 kg(approx) Organic manure should be added to enrich the soil.
      • The seeds can be soaked in curds/milk over night to soften the hard seed coat a day before sowing operations
      • light irrigation must be given immediately after sowing the seeds and care should be taken to see the seed is not dislodged from its place.
      • The most viable seeds take up to 5 days to germinate.
      From Growing Ladies Finger Bhindi in pit system summer cultivation technique
      View of plot after germination

      From Growing Ladies Finger Bhindi in pit system summer cultivation technique
      Complete view of plot

      From Growing Ladies Finger Bhindi in pit system summer cultivation technique

      When plant attains 4 leaf stage, 2 buckets of decomposed farm yard manure is again added to each pit

      IRRIGATION AND MANURING
      • Light irrigation is given immediately after sowing in soil
      • watering needs to be done everyday till the plant attains 4 leaf stage
      • once the plant establishes itself properly in the pit, the frequency of irrigation can be reduced from thrice weekly to twice weekly.
      • its advised to give the plant NKP or nutrients in 3 split doses, one at the time of sowing, the second during the growth vegetative phase and the final at the time of flowering
      • Spraying with organic inputs like algae solutions and bacterial gels at least once weekly will take care of its micro and trace nutrient requirements
      From Growing Ladies Finger Bhindi in pit system summer cultivation technique
      A close up of the growing Okra plant

      From Growing Ladies Finger Bhindi in pit system summer cultivation technique
      Growth visible after a few days

      From Growing Ladies Finger Bhindi in pit system summer cultivation technique
      In pits which do not have germination, plants need to be transplanted and shade provided

      From Growing Ladies Finger Bhindi in pit system summer cultivation technique
      View of the same plot after 10 days

      OTHER INTERCULTURE OPERATIONS
      • Weeds are a menace to the main crop and need to be removed at every stage of plant development.
      • at the time of manuring, the plant needs support at the base of the stem and earthing up operations are done.
      • inter culture operations will also help in aerating the soils
      • Spraying the crop with female flower inducing hormones or sprays can be done at least 10 days before flower bud formation
      • All spraying operations should be done in the mornings, when the temperature is not too high and similarly at evenings after 4 pm when the light intensity is not high.

      From Growing Ladies Finger Bhindi in pit system summer cultivation technique
      Flowering seen after 45 days

      From Growing Ladies Finger Bhindi in pit system summer cultivation technique
      Lush green growth of Okra

      From Growing Ladies Finger Bhindi in pit system summer cultivation technique
      The broad leaves of Okra act as shade retaining the soil moisture

      From Growing Ladies Finger Bhindi in pit system summer cultivation technique
      Distance between pits maintained such that leaves do not overlap

      HARVESTING AND AFTERCARE
      • the first flowers are seen after 45 to 55 days from the date of sowing
      • harvesting the tender fruits must be done preferably early mornings or late evenings
      • a glove or piece of cloth must be used to protect against the prickly leaves and stem of the plant which can cause irritation and even rash to some people
      • the plant will continue to yield for another 50 days
      • once the plant has reached a maximum height, lateral branches start to sprout giving it a total bushy appearance, at this stage, pruning the top can be done, even though its not recommended as it is cumbersome
      From Growing Ladies Finger Bhindi in pit system summer cultivation technique
      Fruiting in Okra

      From Growing Ladies Finger Bhindi in pit system summer cultivation technique

      Ready to Harvest

      OBSERVATIONS
      • since okra has a tap root system and not fibrous root system, i decided to experiment with pit method rather than the traditional ridge and furrow method.
      • there was all around progress in almost every department from weeding to irrigation
      • plant population and density was maintained
      • no wastage of irrigation water as each pit required the same amount of water
      • even manure application for every pit was the same
      • keeping distance between pits helped greatly in harvesting, as the plants got maximum space and no over lapping of leaves was seen.
      View slide show presentation here


      All data and images by Pritham Denzil D'Souza