Showing posts with label monsoon technique. Show all posts

Sunday, September 26, 2010

Interculture Operations in Chilli

Interculture Operations in Chilli by Pritham 'MetalFarmer' D'Souza

I have covered Chilli (Capsicum annuum) in my previous posts and here i would like to show you how to perform simple inter culture operations like manuring and weeding in the Chilli plot.

From Interculture Operations in Chilli


From Interculture Operations in Chilli


WEEDING
  • The single most important threat to a successful chilli garden
  • since this post shows chilli grown in the monsoon season, weeds can be seen more regularly
  • i do not suggest chemical methods of controlling, as the residue will leave a toxic effect on the standing crops.
  • manual weeding is the best method to control this and the best time for weeding is during manure application
From Interculture Operations in Chilli

  • the weeds growing on the bunds or raised platforms must be removed as shown in the pic above
From Interculture Operations in Chilli

  • then the bunds are broken and the soil is made loose. this is done for aeration and also to increase the porosity of the soils
FERTILIZER AND MANURE APPLICATIONS
  • freshly decomposed farm yard manure is mixed with neem cake and applied to the soil as shown in the pic below
From Interculture Operations in Chilli


From Interculture Operations in Chilli


From Interculture Operations in Chilli


  • after completing the manure application, the soil is once again covered and this gives strength and support to the plant
From Interculture Operations in Chilli


  • spraying the crop with plant hormones can be done to increase the number of female flowers.
  • since there are several plant hormones in the market i suggest you carefully select the best one. i use BIOVITA which is an organically prepared solution comprising of seed weed algae fortified with trace minerals and plant growth regulators, sprayed @ 2 ml per litre of water
all images and data by Pritham D'Souza aka MetalFarmer

Thursday, September 23, 2010

Pitting method of Cultivating Bitter Gourd

Pitting method of Cultivating Bitter Gourd by Pritham Denzil Dsouza aka 'Metal Farmer'
i have already discussed how to cultivate Bitter Gourd (Momordica charantia) in my previous post in continuous pits . here i would like to show you how one can grow Bitter Gourds in individual pits.


  • the size of every pit is around 60 cms X 60 cms and height is about 30 cms
  • in every pit around 6 seeds are sowed
  • after germination, 3 seeds are retained per pit
  • this is done to prevent over crowding

  • support in the form of sticks has to be given during vegetative phase
  • the vines tend to fall to the ground and care has to be taken to see the vines are trained on top of the support so as to move upwards

  • during flowering phase, thousands of bright yellow flowers are seen, however only one tenth of them will pollinate and yield fruit


  • once the vines reach a desired height as shown above, they will need to start growing vertically and a proper trellis needs to be built as seen in the pic below


  • results can be seen in 21 days as the pic shows above
  • retaining just 3 seeds per pit has resulted in lush growth of the vines in every pit
  • watering the pits is easy and there is no wastage
  • application of manures can also easily be done per pit


  • there is a tendency for the vines to produce excessive lateral shoots and they too are given support so they move upwards as shown in the pic above


Advantages of growing in pits
  • plant density and plant population can be maintained
  • no over crowding
  • application of manure and fertilizer is much easy
  • no wastage due to excessive drainage
  • spraying with neem using back pack sprayer is convenient and can be done from a distance
  • harvesting is easy
  • the resultant shade increases pollination by attracting a large number of pollinators
all images and data by Pritham 'Metal Farmer' D'Souza

Friday, August 13, 2010

Bitter Gourd Cultivation in Continuous Pits

Bitter Gourd Cultivation in Continuous Pits by Pritham D'Souza Metal Farmer

Bitter Gourd (Momordica charantia) also known as bitter gourd or Karela (hindi), karathe (konkani) and kanchala (tulu) is cultivated in mainly tropical and sub tropical places throughout the world.
From Bitter gourd cultivation in continuous pits By Pritham D'Souza Metal Farmer


The bitter taste is due to the presence of Momorcidin. The wonder fruit, which is consumed as a vegetable is widely used in traditional medicines and is well known for treatment against diabetes, preventing malaria and constipation. It is also used as an effective bio repellent. however the red arils of the seed (outer red coating) can be toxic to children.

Bitter gourd is an acquired taste, but its medicinal properties make it a commercially viable crop.

Climate and Soil
From Bitter gourd cultivation in continuous pits By Pritham D'Souza Metal Farmer

  • being a tropical crop, it grows well in temperatures ranging from 28 to 35 degrees celcius
  • extreme temperatures not favorable as it will result in spread of mosaic disease caused by virus
  • soils have to be well drained and loamy.
Sowing
From Bitter gourd cultivation in continuous pits By Pritham D'Souza Metal Farmer

  • the seed coat is very hard and unless conditions are favorable, germination will not take place as usual. for this , soaking the seeds in water for a minimum of 24 hours before sowing is recommended to break the seed dormancy
  • in some places water is replaced by curds and it also helps in rapid germination as the curds contain bacteria which also break the seed dormancy by softening the hard seed coat
From Bitter gourd cultivation in continuous pits By Pritham D'Souza Metal Farmer


  • dried and decomposed farm yard manure is added to the pits just before sowing the seeds
  • each pit, about 5 seeds are sowed and after germination 2 plants retained in every pit
  • the distance between pits is about 45 cms
Inter Culture Operations
From Bitter gourd cultivation in continuous pits By Pritham D'Souza Metal Farmer

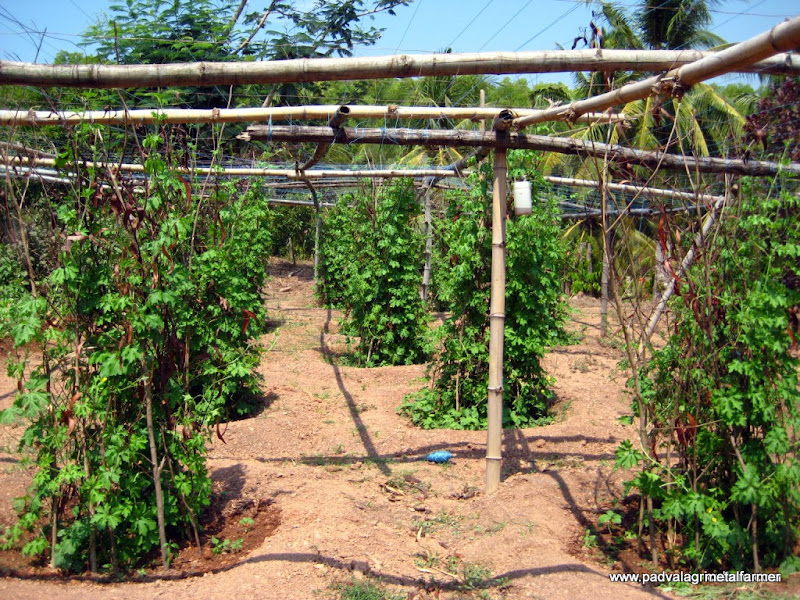
  • after about 21 days after sowing, the growing tendrils will begin to droop on the ground. this will require support and it being a climber, adequate arrangements need to be made
From Bitter gourd cultivation in continuous pits By Pritham D'Souza Metal Farmer

  • here the soil around each plant is gathered around to fortify the pit and organic manure is added to each pit
  • then support in the form of long sticks is placed in each pit as shown
  • the growing vines are then trained on them and a pendal is erected
From Bitter gourd cultivation in continuous pits By Pritham D'Souza Metal Farmer

From Bitter gourd cultivation in continuous pits By Pritham D'Souza Metal Farmer

  • the pits help to prevent excess leaching of water and acts as a retention barrier
  • weeding, irrigation and earthing up of the soils are made easier
  • moist soils require less irrigation, about once a week, while areas which have direct sunlight, require frequent irrigation.
  • pits also help in mulching and prevents loss of water by evaporation
Flowering and Harvest
From Bitter gourd cultivation in continuous pits By Pritham D'Souza Metal Farmer

  • spraying certain growth hormones such as Ethrel is done to increase the number of felame flowers and has to be done 2 weeks before flowering begins
  • during flowering, another dose of farm yard manure or dried and decomposed organic manure is added @ 10 kg per pit
  • if the manure is fresh and not properly decomposed, it will injur the roots and stem
From Bitter gourd cultivation in continuous pits By Pritham D'Souza Metal Farmer

  • fruits can be harvested after 60 to 75 days from the first day of sowing
  • the tender , immature fruits are preferred over ripe fruits
  • soon after harvesting, they are washed in water and dried before taking to market
Pests of Bitter Gourd and Treatment
  • the bitter taste of the fruit prevents it from getting attacked as frequent as the other crops belonging to the cucurbit family, however the major pests include the following
  1. red pumpkin beetles which are most notorious as if feeds the young and tender leaves during growth stage. also feeds on the flowers .
  2. Stink Bugs are huge and have a plate of scaly armour to prevent from natural predators attacking it. also it releases a stink liquid which helps it to escape before getting caught. it feeds on tender fruits and results on rotting of the fruit
  3. aphids and thrips can cause serious damage, while the former can colonise the plant, the latter can feed on the leaves which later curl inside
  4. leaf eating caterpillar destroy the leaves and skeletonise the plant, the silk cucoons can be seen mostly on lower surface of the leaves
  5. fruit fly bores on the growing fruit and lays the eggs which grow inside the fruit. worms can be seen in the rotting fruits
Treatment
integrated farm management practises recommend the use of both organic as well as chemical pesticides for effective control of pests . however since i advocate the use of mostly neem based sprays, i advise the following
  1. neem cake applied to the soil at 25 day intervals around the plant
  2. during the growing stage, neem solution is sprayed weekly twice @5 ml per litre water
  3. during flowering stage , Neem solution is sprayed weekly once @10 ml per litre
  4. since neem is all natural and non toxic , it can be sprayed on standing crops and when yield is seen
  5. spray neem preferably in the evenings, when its cooler between 4 to 6 pm

all data and images by Pritham dsouza aka Metalfarmer

Monday, November 2, 2009

Monsoon Cultivation Of Cucumber

Monsoon Cultivation Of Cucumber by Pritham 'Metal Farmer' D'Souza

Cucumber (Cucumis sativus) is one of the most widely used salad crops grown both in North and South India. Fruits contain good amount of Iron and Vitamin C along with carbohydrates. It is highly recommended for people suffering from Jaundice, constipation and indigestion

LAND PREPARATION
since i am mentioning the monsoon cultivation techniques here, the land preparation is very similar to my other posts where i have mentioned monsoon cultivation. Some main points to begin with
  • The land selected must have adequate drainage
  • water logging areas should not be selected
  • however if availability of land is a constraint, seeds have to be sown on elevated bunds as shown below
  • Due to heavy rains, most of the seeds get drowned with too much moisture and they start to rot even before germination, hence more seeds have to be sowed.
  • bunds or raised seed beds should have a minimum height of 10 to 15 inches and seeds once germinated must be thinned out and plant distance maintained


germination seen 7 to 10 days after sowing


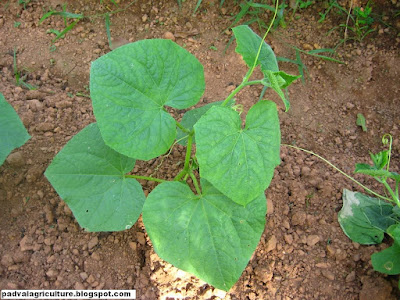
close up of germinated seedling

seedling reaches 3 leaf stage in the 3rd week of sowing

the above pic shows water severely logged in the field. the raised seedling bed literally saved the seedlings from rot and drowing.

the photo above shows considerable growth and development of the plant when rainfall recedes and light intensity increases

excess plants must be thinned out and plant distance must be maintained as seen above

INTER CULTURE OPERATIONS AND IRRIGATION
  • Since this is monsoon technique, irrigation is not given, however, due to erratic rainfall patterns, lite irrigation is a must at the time of sowing to moisten the field in case rains fail.
  • while making the raised beds/bunds, decomposed Organic Manure must be added to the soil, and mixed thoroughly and seeds must be sowed on top of this. When the seeds germinate and grow, they will make use of the nutrients present in the soil
  • DO NOT spray the crops during monsoons using pesticides or liquid fertilizers when there is not enough sunlight.
  • Spraying of Liquid fertilizers should be done only when required and in the presence of sunlight. plants prepare their own food during photosynthesis and so sunlight is the most important factor.
  • Soil aeration can be increased by loosening the soil around the root zone of the plants. this also helps in drainage.
the above figure shows rapid development of the plant and tendril stage

soil loosened to provide good aeration and also allow better drainage

MANURING, FLOWERING AND HARVESTING
  • The plant receives the basal dose of decomposed farm yard manure at the time of preparation of the land and sowing.
  • Spray 1 ml seed weed based algae Organic Manure in 1 litre of water at every 10 day intervals. addition of wetting agent like APSA or other sticking agents is recommended so as to increase the effectiveness of the sprays
  • Flowering will be seen 40 to 45 days after sowing and the mature fruits can be harvested after 55 to 60 days after sowing.
  • Timely harvesting the fruit is a must otherwise they over ripe and become unfit for consumption. for salads, the green color of the fruit must not turn brownish yellow.
  • fruits must be plucked every alternate days to avoid over riping
  • for seeds, yellow brown fruits , golden fruits (mature color) are harvested, seeds extracted, washed thoroughly in water and dried
  • the seeds thhus obtained must be sowed again within 3 to 6 months or it looses its viability
  • Cucumber yields up to 100 quintals per hectare

the above pic shows the same stretch of land with excellent growth and flowering


formation of tender fruit buds

growing tender fruit
mature fruit ready for harvest

PESTS , DISEASES AND CONTROL
  • I only recommend the usage of pure neem oil @ 5 ml per litre of water to be sprayed only when insect attack is seen
  • Imidochloprid systemic insecticide @2 ml in 5 litre water can be used every 10 days for the young seedlings since they are most vulnerable to sucking pests like aphids, thrips and plant minors. it is also effective in controlling red pumpkin beetle which damages the growing leaves and severely injures the plant
  • Spraying must be done in sunny weather and not in gloomy weather
  • spraying in the evenings from 4pm to 5 pm is recommended than spraying during day time as it will affect pollination
  • adding 2 ml per litre sticking agents or wetting agents is required to increase the effectiveness of the sprays


all photos and data by Pritham D'Souza